Secure Boot Setup
Pre-setup
Section titled “Pre-setup”GRUB Boot Manager
Section titled “GRUB Boot Manager”If you are using GRUB, run the following command to enable secure boot support on GRUB using CA Keys.
sudo grub-install --target=x86_64-efi --efi-directory=/boot/efi --bootloader-id=cachyos --modules="tpm" --disable-shim-lockEnabling Setup Mode in UEFI
Section titled “Enabling Setup Mode in UEFI”Firstly, we need to go to firmware settings and set secure boot mode to “Setup Mode”. You can reboot from an already running system to firmware settings with following command.
systemctl reboot --firmware-setup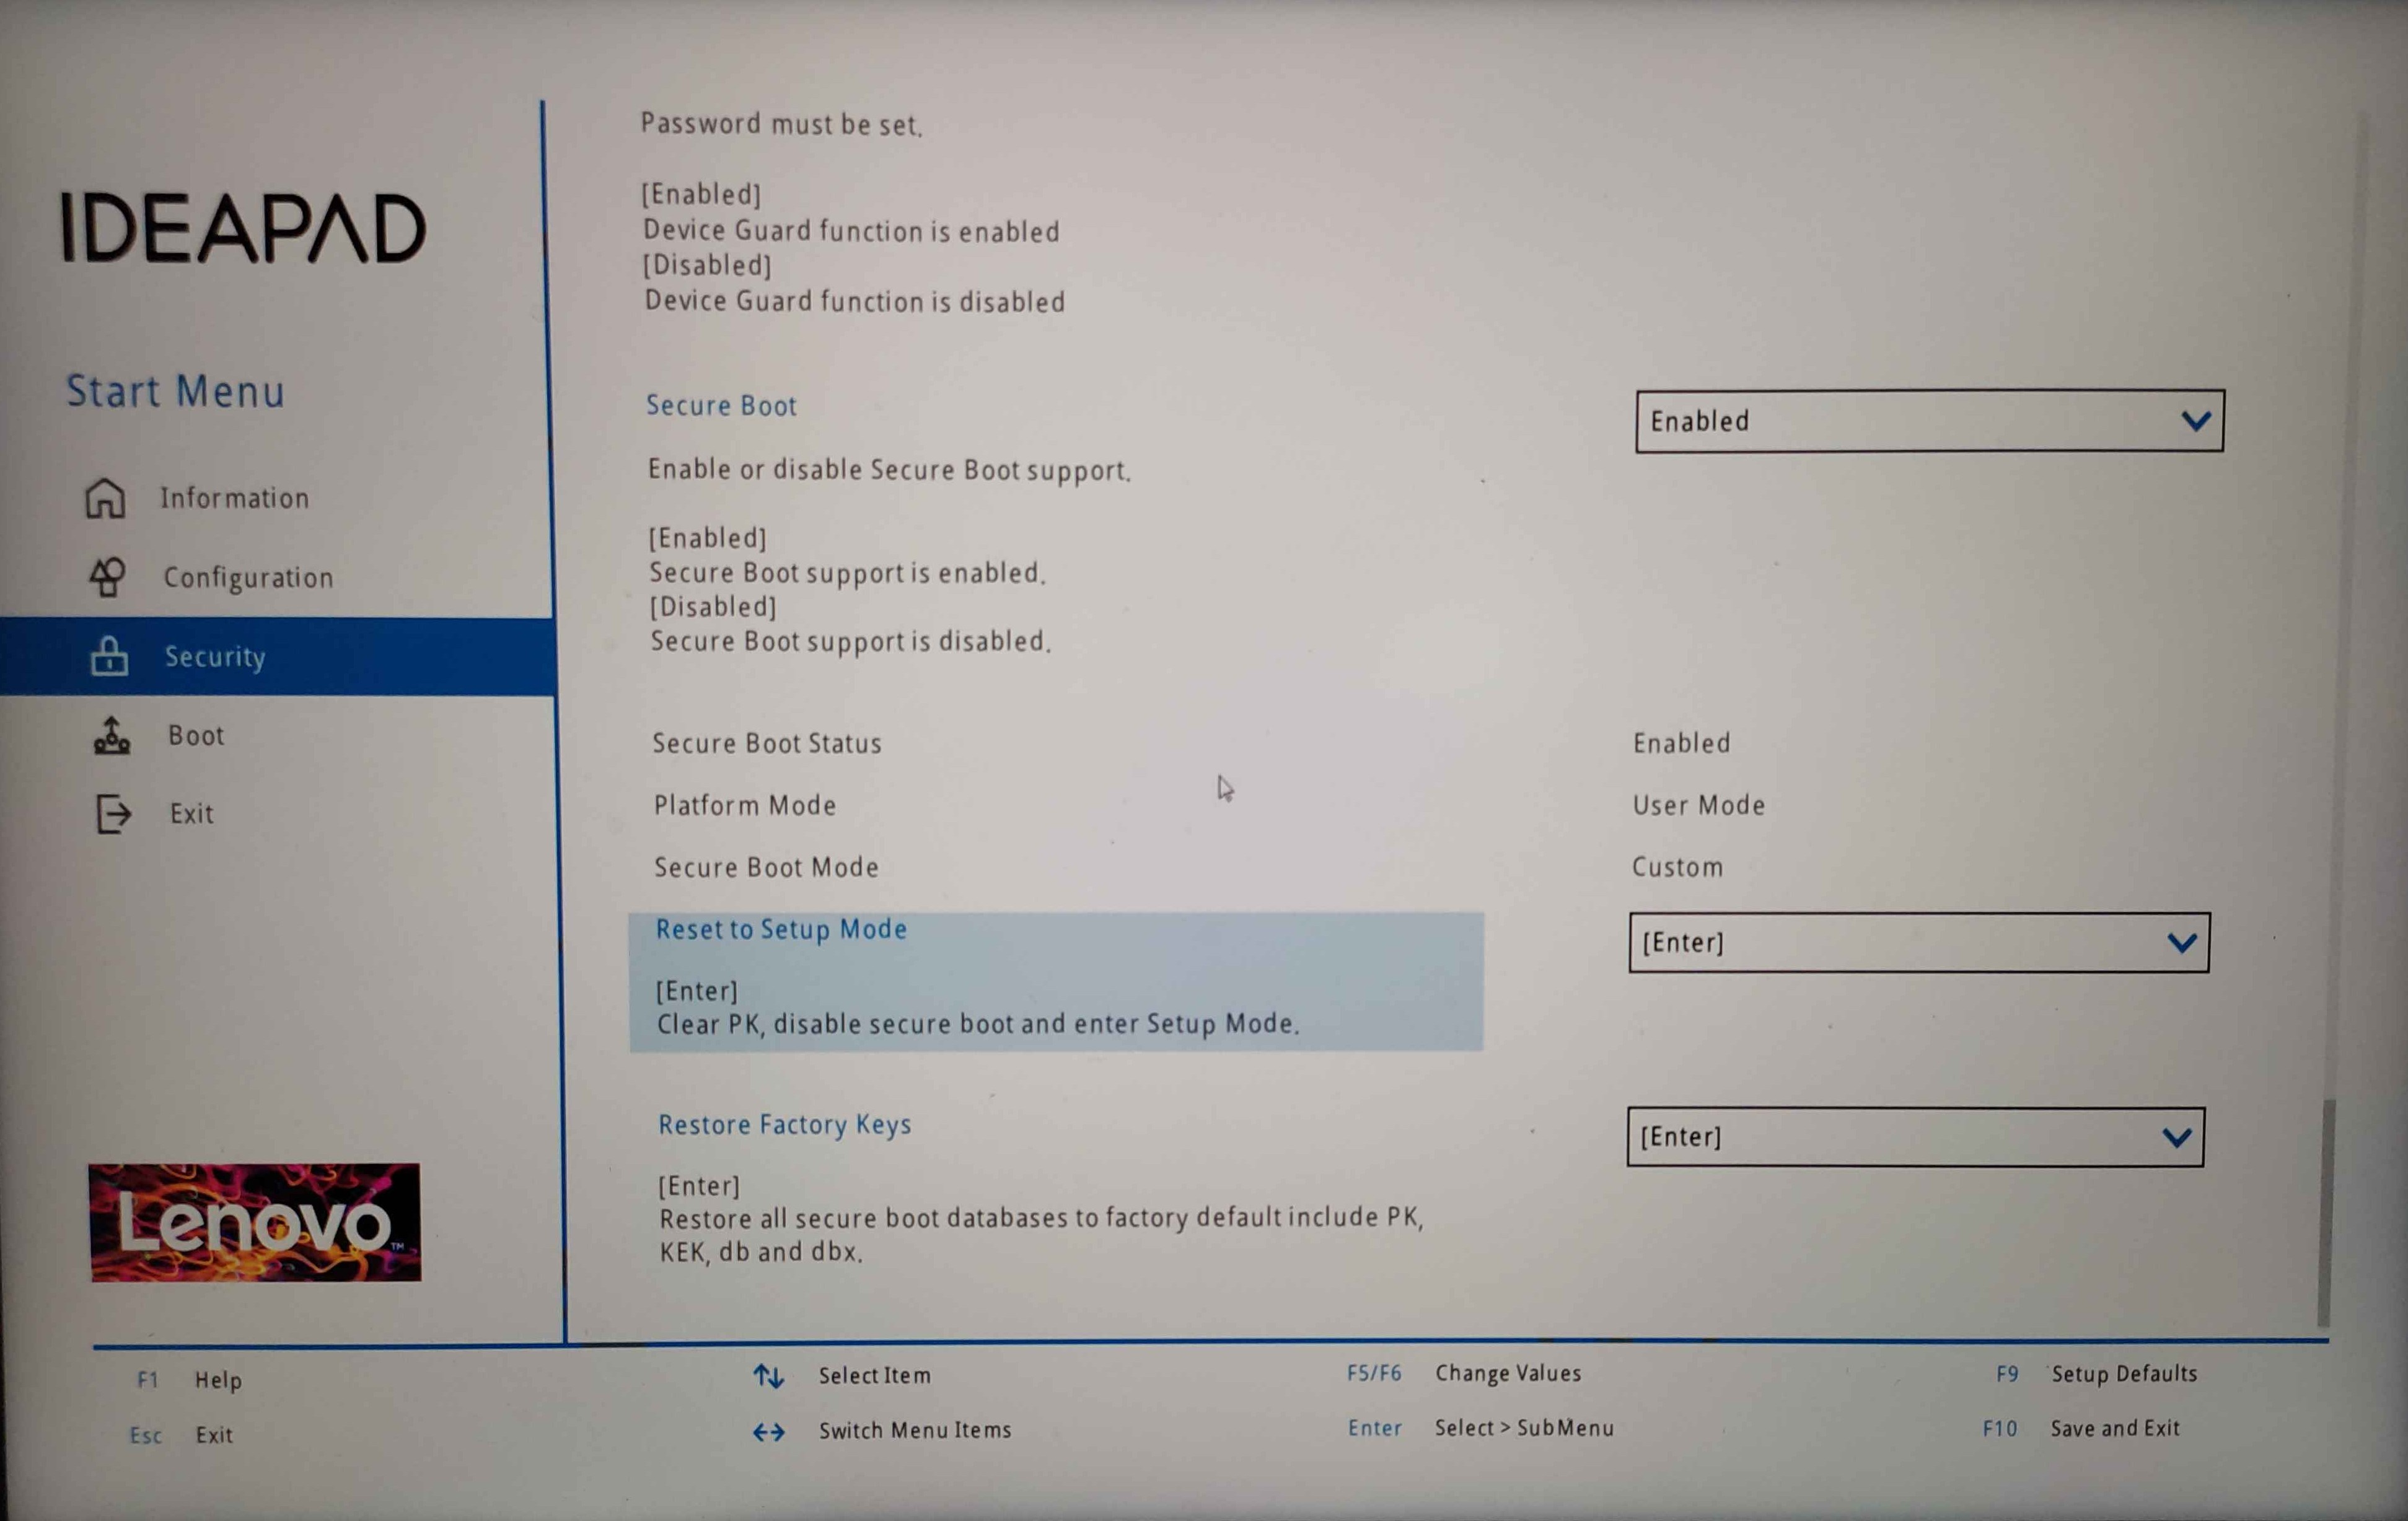
This is how the BIOS looks like on a Lenovo Ideapad 5 Pro. Reset to setup mode or restore factory keys and reboot back to the system.
However, some MSI motherboards don’t have a Setup Mode. To achieve the same effect, set the Secure Boot Mode to “custom” and select the “maximum security” compatibility option (this is important: with the default mode, you might not be able to boot from your bootloader into CachyOS!). Then, go into “key management” and follow the two steps illustrated in the image below:

Some Asus motherboards have a similar behavior to the above mentioned MSI motherboards, as they do not have a dedicated setup mode.
Navigate to Boot → Secure Boot, set Secure Boot Mode to Custom, then open Key Management and select “Delete all Secure Boot Variables”.
Installing sbctl and Enrolling Keys
Section titled “Installing sbctl and Enrolling Keys”Before proceeding, make sure to check if sbctl is installed.
sbctl is a user-friendly secure boot key manager capable of setting up secure boot, offering key management capabilities, and keeping track of files that need to be signed in the boot chain.
How to install sbctl
sudo pacman -S sbctlNow that sbctl is installed, you have to setup sbctl and enroll your keys to the firmware. This process is pretty straightforward, just follow the steps below.
-
Check if Setup Mode is enabled:
Terminal window sudo sbctl statusExpected Output
Terminal window Installed: ✘ sbctl is not installedSetup Mode: ✘ EnabledSecure Boot ✘ Disabled -
Create your custom Secure Boot keys:
Terminal window sudo sbctl create-keysExample of a successful key creation
Terminal window Created Owner UUID a9fbbdb7-a05f-48d5-b63a-08c5df45ee70Creating secure boot keys...✔Secure boot keys created! -
Enroll your keys with Microsoft’s and the OEM firmware’s built-in keys:
Terminal window sudo sbctl enroll-keys --microsoft --firmware-builtinExpected output
Terminal window Enrolling keys to EFI variables...✔Enrolled keys to the EFI variables! -
Check the status of sbctl again to make sure that the keys are enrolled and setup mode is disabled:
Terminal window sudo sbctl statusExpected Output
Terminal window Installed: ✔ sbctl is installedOwner GUID: a9fbbdb7-a05f-48d5-b63a-08c5df45ee70Setup Mode: ✔ DisabledSecure Boot ✘ DisabledVendor Keys: microsoft
Signing the Kernel Image and Boot Manager
Section titled “Signing the Kernel Image and Boot Manager”Limine is a special boot manager that allows checking the hash of kernel
images and other files that Limine uses during boot. If this is enabled, any
sort of manual configuration done by the user, e.g. signing the image via
sbctl-batch-sign, will modify the hash of the corresponding files and
fail Limine’s checksum verification.
However, signing these files isn’t necessary on Limine because it has a special boot process that bypasses EFI chainloading and signature checks. The only EFI binaries that need to be signed are Limine itself.
To enable automatic config checksum enrollment, set the following in /etc/default/limine:
ENABLE_ENROLL_LIMINE_CONFIG=yesProceed to generate a hash for Limine’s splash image:
- Check the current name and path of the splash image in the config file:
You should be able to spot a line like this:
Open a terminal and run the following command: sudo cat /boot/limine.confTerminal window wallpaper: boot():/limine-splash.png - Generate a BLAKE2B hash for the splash image and append it to the path in the config file:
This will output a hash like this example:
Run the following command, replacing the path with the one you found in the previous step: sudo b2sum /boot/limine-splash.pngTerminal window 75205d08fa9c61599897857e861d6b2f6da25465183fc4cc9efecffb22ee630efb510f2ef1b17677db94c28d5c69ad2ceb4d3892f5bec9cfa65c97b5ba16f52f - Afer copying the newly generated hash from the previous step. Open the config file with a text editor and append the hash to the path of the splash image, like this:
As you can see, the hash is appended to the path with a
Terminal window wallpaper: boot():/limine-splash.png#75205d08fa9c61599897857e861d6b2f6da25465183fc4cc9efecffb22ee630efb510f2ef1b17677db94c28d5c69ad2ceb4d3892f5bec9cfa65c97b5ba16f52f#symbol. Save the file after making the change.
After enabling config checksum enrollment and generating the hash for the splash image, run the following commands to enroll the config checksum and sign Limine’s EFI binary:
# Use limine-enroll-config to enroll the config checksum and sign Limine's EFI binary# This uses sbctl under the hoodsudo limine-enroll-configsudo limine-updateCachyOS provides sbctl-batch-sign,
a script that takes the list of files needed to be signed from sudo sbctl verify and signs them all.
sudo sbctl verifyVerifying file database and EFI images in /boot...✘ /boot/1c4b5246eef05ac3bc87339323cd5101/6.10.0-cn4.0.fc40.x86_64/linux is not signed✘ /boot/EFI/BOOT/BOOTX64.EFI is not signed✘ /boot/EFI/systemd/systemd-bootx64.efi is not signed✘ /boot/1c4b5246eef05ac3bc87339323cd5101/0-rescue/linux is not signed✘ /boot/1c4b5246eef05ac3bc87339323cd5101/6.10.0-cn3.0.fc40.x86_64/linux is not signed
sudo sbctl-batch-sign
sudo sbctl verifyVerifying file database and EFI images in /boot...✔ /boot/1c4b5246eef05ac3bc87339323cd5101/6.10.0-cn4.0.fc40.x86_64/linux is signed✔ /boot/EFI/BOOT/BOOTX64.EFI is signed✔ /boot/EFI/systemd/systemd-bootx64.efi is signed✔ /boot/1c4b5246eef05ac3bc87339323cd5101/0-rescue/linux is signed✔ /boot/1c4b5246eef05ac3bc87339323cd5101/6.10.0-cn3.0.fc40.x86_64/linux is signed
Now that all the files are signed. Reboot your system and go to your UEFI Settings to enable Secure Boot.
Check this part for reference
Note that this is a one-time process as signing files with -s flag will save those files to sbctl’s database.
CachyOS uses systemd-boot-update.service provided by systemd to update the boot manager on reboot. This means that the sbctl
pacman hook will not sign the updated EFI binaries. As a workaround, we can sign the boot manager directly
sudo sbctl sign -s -o /usr/lib/systemd/boot/efi/systemd-bootx64.efi.signed /usr/lib/systemd/boot/efi/systemd-bootx64.efiSecure Boot Status Check
Section titled “Secure Boot Status Check”To check that secure boot is indeed enabled. You can run one of the following commands
sudo sbctl statusInstalled:      ✓ sbctl is installedOwner GUID:     a9fbbdb7-a05f-48d5-b63a-08c5df45ee70Setup Mode:     ✓ DisabledSecure Boot:    ✓ EnabledVendor Keys:    microsoft
bootctlSystem:      Firmware: UEFI 2.80 (INSYDE Corp. 28724.16435) Firmware Arch: x64   Secure Boot: enabled (user)  TPM2 Support: yes  Measured UKI: no  Boot into FW: supported
Links and Credits
Section titled “Links and Credits”- The Arch Wiki laid the groundwork for this guide. Most of the stuff here was taken from there.
- sbctl - This easy guide to enable secure boot support wouldn’t have been possible if it weren’t for the amazing work done to create this piece of software.
- Improving the Secure Boot Experience by Morten linderud - Blog post by Morten
“Foxboron” Linderud on how the secure boot experience was complicated before
sbctl.